Natural Hairline Design: Principles and Clinical Details
A natural-looking hairline begins with a position that suits the face, a soft leading edge and a plan that accounts for future hair loss. Height, shape, hair characteristics and donor capacity need to work together. This article combines published design principles with Dr. Kinyas Düşünmez’s description of his own clinical approach.
Planning starts with expectations
“Before drawing, I review the patient’s history, the pattern of hair loss and what they hope to change. Some want a smaller-looking forehead; others are concerned about temple recession or the fullness of the frontal area. I first clarify which of these matters most to them.”
Expectations are considered alongside the available donor hair and the likely course of hair loss. In younger patients, the current bald area may not reveal the eventual extent of loss. A design should therefore leave room for future needs rather than use donor resources solely to achieve today’s preferred outline.[4,5]
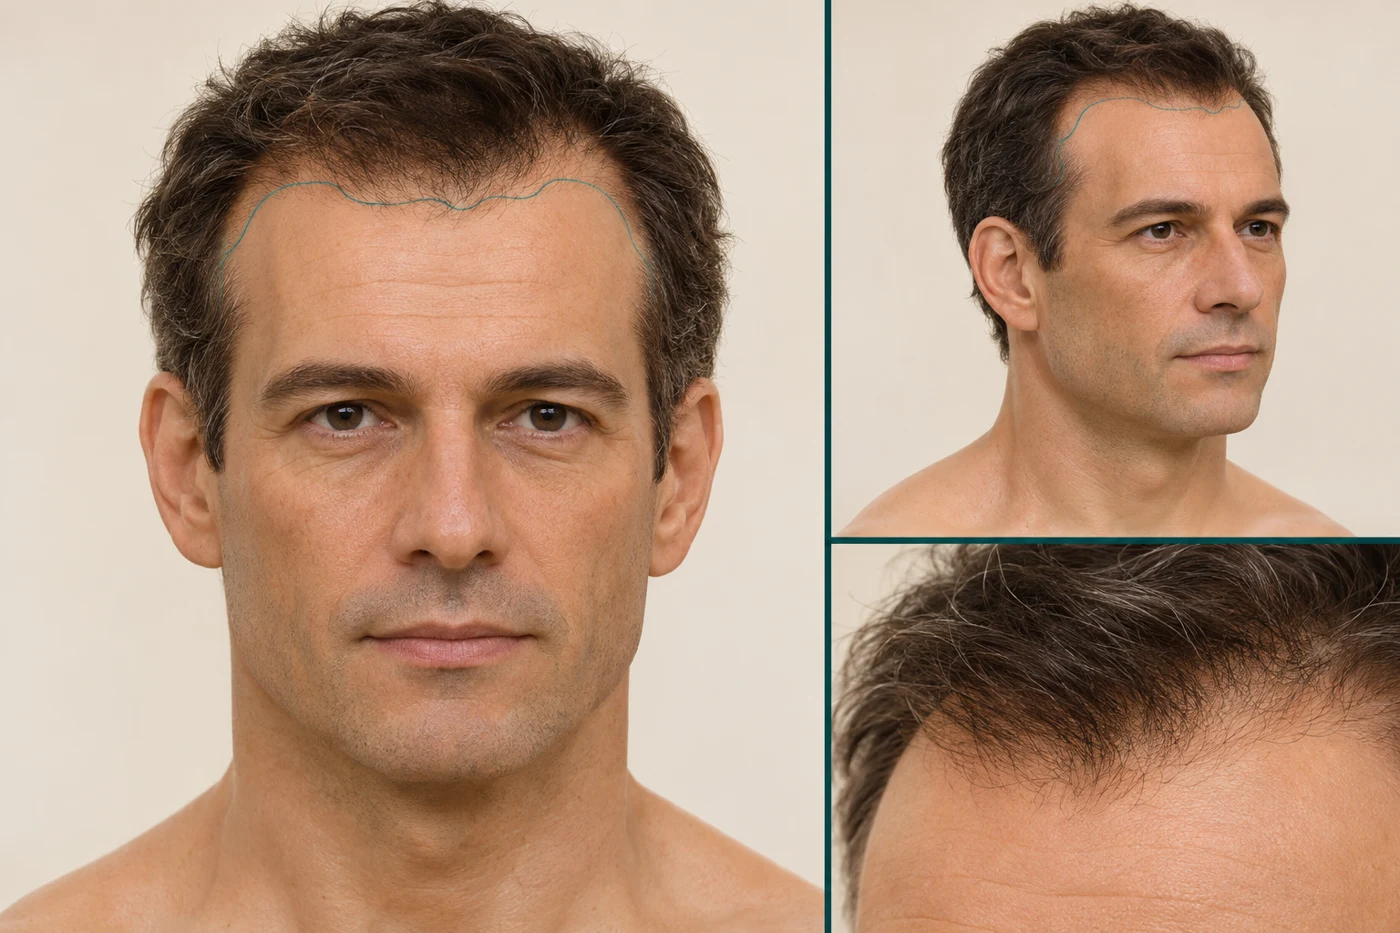
Where should the hairline start?
There is no single forehead height that suits everyone. Facial proportions, forehead curvature, head shape, existing hair and donor resources all influence the position. Anatomical measurements provide a framework; they do not replace individual assessment.[2–4]
“I use the distance from the glabella—the central area between the eyebrows—to the mid-frontal point as an initial reference. In my own practice I frequently choose approximately 6.7–7 cm, sometimes 7.5 cm, and generally avoid going below 6 cm. These are descriptions of my personal practice, not universal limits. A particular patient may need a higher hairline.”
Moving the line forward increases the area that needs coverage. Maintaining fullness over that larger area may require additional grafts and leave fewer options for the mid-scalp or crown later. The potential aesthetic benefit should be discussed together with that donor cost.[4]
The landmarks used in drawing
| Landmark | Meaning |
|---|---|
| Glabella | The central forehead region between the eyebrows, used as a measurement reference. |
| Mid-frontal point — MFP | The most anterior point of the planned frontal hairline at the midline. |
| Mid-pupillary point — MPP | A point on the hairline near the vertical line through the pupil, where the contour begins to turn backward. |
| Frontotemporal junction / angle | The corner where the frontal and temporal hairline borders meet. |
| Temporal point — TP | The triangular projection farther down the temporal hairline; it is distinct from the upper frontotemporal junction. |
These landmarks help describe the design.[2] The “vertical line from the outer canthus” mentioned in technical literature means an imaginary line drawn upward from the outer corner of the eye. It is a reference for assessing the frontotemporal corner, not a mandatory location that overrides the patient’s anatomy.
Dr. Kinyas’s approach from the centre to the sides
“After selecting the central point, I check its relationship to the facial midline using laser alignment and other facial references. The laser is a positioning aid; facial asymmetry still needs to be assessed.”
“I then mark auxiliary points approximately 1.5–2 cm on either side of the centre. These are my own drawing references for building the central contour, rather than separately named anatomical landmarks. Small projections and recesses help shape the transition toward the sides.”
“Next I assess the imaginary vertical line through each pupil. In my drawings, the distance from the centre to this region is often approximately 3.5–4 cm. The actual pupil position and the three-dimensional shape of the head take priority over that number. I connect the centre, the auxiliary points and the lateral turn with a gentle contour that rises and turns backward toward the sides.”
The quoted measurements describe Dr. Kinyas’s clinical workflow. They are not a validated formula, and measurements made over the skin surface are not interchangeable with distances projected onto a photograph. Other published approaches use different geometric frameworks; no single framework establishes the best design for every face.[6]
The temples complete the frame
“I assess the frontotemporal junction in relation to the existing temporal border and temporal point. The meeting area needs a soft connection and region-appropriate hair direction. I then repeat the assessment on the opposite side and compare the heights, slopes and overall balance.”
A frontal photograph alone cannot explain the entire temple transition. The design is also checked from oblique and lateral views. Filling the recess too aggressively may change the facial frame and use donor hair needed elsewhere. The degree of recession is individual; there is no single M-shaped outline that every person must have.[2,3]
Overall balance and small irregularities
“I review the drawing with photographs and, when useful, ask for a second or third assessment from my team. I check the broad balance while keeping small irregularities along the leading edge. The patient sees the drawing and we discuss any changes before agreeing on an achievable plan.”
Overall balance does not mean that every small notch must be mirrored. Naturalness involves both larger variations in the contour and subtle differences in individual hair placement. Equally spaced, identical zigzags can become a visible pattern rather than a natural border.[1,2]
“M-like contours are common in my practice, although some patients prefer a flatter or more oval design. I consider personal preference alongside their own hair characteristics, facial anatomy, donor resources and future loss.” Ethnic background alone does not dictate a person’s preferred or appropriate hairline.
A soft leading edge with fullness behind it
“For the very front, I select fine single-hair grafts. In my practice, the anterior single-hair-dominant band is often approximately 0.25–0.5 cm deep. This describes the foremost band, not the full depth of the transition region in every patient.”
Behind the leading edge, the distribution is adapted using suitable single- and multi-hair units to support fullness. Graft hair count, shaft thickness and placement all matter. The aim is a gradual visual transition, preserving the softness of the front while reducing how far one can see through to the scalp behind.[1,2]
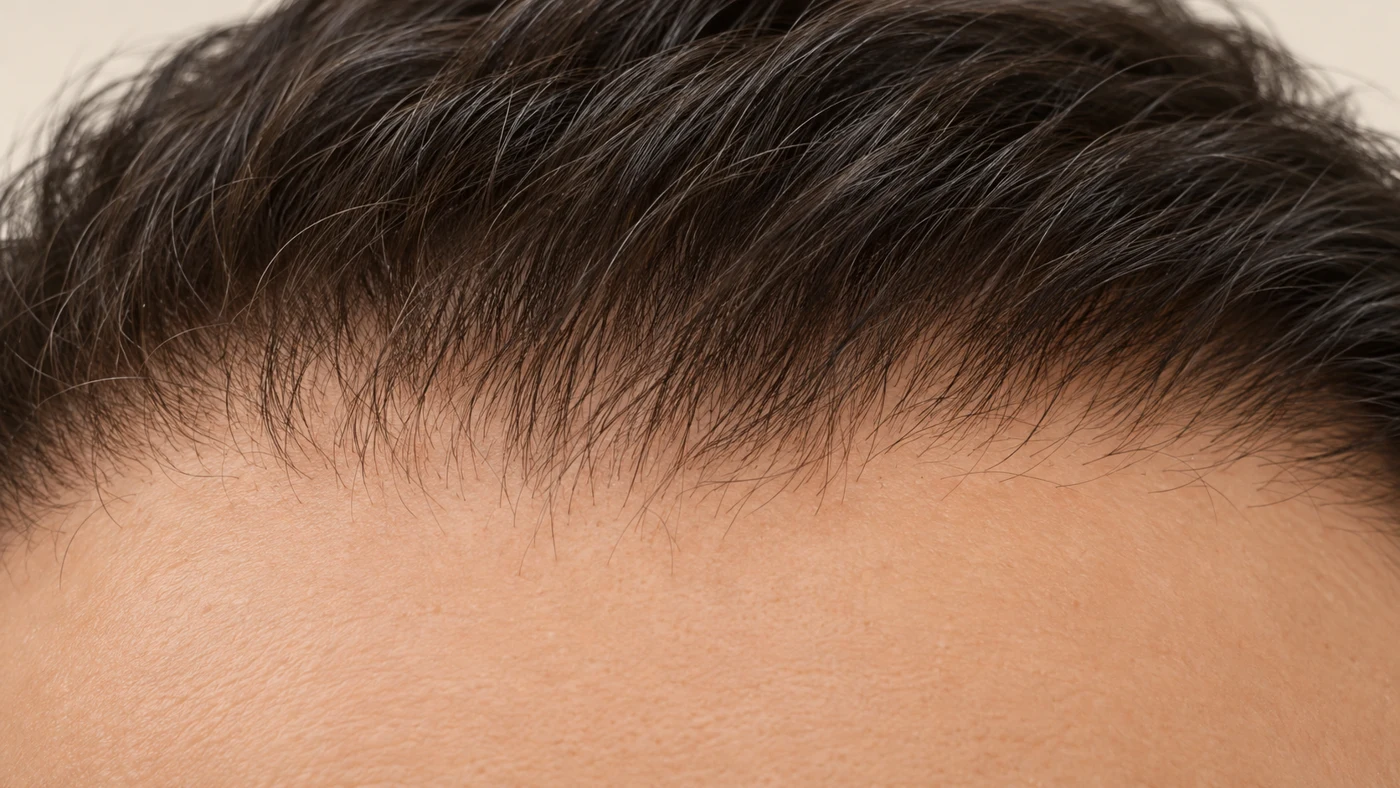
“I pay particular attention to single-hair grafts at the visible frontotemporal connection and along the small irregularities. The exit angle and direction follow the needs of that region.” A graft’s exit angle describes its inclination to the skin; direction describes where it points across the scalp. These are separate features.[2,3]
Fine hair is not the same as miniaturised hair
Dr. Kinyas describes selecting fine hairs from suitable lateral and lower donor regions where appropriate. Naturally fine, stable donor hair must be distinguished from follicles affected by progressive miniaturisation. Not every fine hair at the lower or lateral donor boundary is a suitable long-term choice. Donor boundaries and signs of retrograde loss or miniaturisation need assessment.[4,7]
How many single-hair grafts are needed?
“In my clinical observation, the single-hair grafts set aside for the frontal border often range from approximately 400 to 1,000. This is not a published case-series result or a target for every patient. The length of the line, the depth of the single-hair band, hair characteristics and whether the temples are included all change the requirement.”
A graft count is meaningful only when the area it covers is clear. The visible border, the entire frontal zone and temple reconstruction should not be treated as equivalent graft budgets.
Does DHI or Sapphire FUE guarantee a natural hairline?
A technique or instrument name cannot, by itself, establish how natural a design will look. Ask about the proposed position, selection of hairs, transition, direction and donor plan. These design decisions need evaluation alongside the method of implantation.[1–3]
Questions to ask before agreeing to the drawing
- Why does this height and shape suit my face and hair loss pattern?
- How will the frontal border connect to my temples?
- How will the fine leading edge and fuller area behind it be created?
- What is the graft allocation, and what remains available for future needs?
- How might the design look if my existing hair continues to thin?
These are consultation prompts, not a validated scoring system. A drawing or simulation illustrates a target and does not guarantee the biological outcome.
What is supported by evidence?
Hairline design guidance relies largely on technical publications and expert clinical judgment. The cited practice guideline assigns level 4 evidence to male hairline design recommendations. The principles are useful, but they do not establish one universally superior height, shape or graft density.[4]
The first-person descriptions here reflect Dr. Kinyas’s account of his own clinical practice. They are distinguished from research findings and do not claim a separately validated technique or guaranteed result.
References
This article combines a targeted literature review with a clinical practice account; it is not a systematic review. It does not replace individual medical assessment.
- Shapiro R. Principles and techniques used to create a natural hairline in surgical hair restoration. Facial Plast Surg Clin North Am. 2004;12(2):201–217.
- Shapiro R, Shapiro P. Hairline design and frontal hairline restoration. Facial Plast Surg Clin North Am. 2013;21:351–362.
- Beehner M. Hairline design in hair replacement surgery. Facial Plast Surg. 2008;24(4):389–403.
- Hair Transplant Practice Guidelines. J Cutan Aesthet Surg. 2021.
- ISHRS. Early Hair Loss — The Young Patient.
- Garg AK, Garg S. Decoding Facial Esthetics to Recreate an Esthetic Hairline: A Method Which Includes Forehead Curvature. J Cutan Aesthet Surg. 2017;10(4):195–199.
- ISHRS FUE Advancement Committee. FUE Guidelines. 2019.